Popular Posts

February 28, 2016

Weekend Brunch Monte Cristo


As much as I love cooking and finding new creative things to make, I often repeat the same dishes for breakfast. It's generally some sort of scramble depending on what veggies I have on hand, an occasional homemade hash or a baked good. This weekend I was up at my old college stomping grounds which meant a late Friday night leading into a lazy Saturday morning; A perfect reason to make brunch.

I am a huge fan of Monte Cristos and would like to personally thank the genius who first came up with the idea to nestle ham and cheese between pieces of French toast. I add cinnamon to my French toast in this recipe, and with a drizzle of real maple syrup it's a breakfast that is tough to beat!


I used honey ham and a smoked swiss cheese and thought the savory and sweet flavors balanced perfectly. We loved it so much that we made it for breakfast on Sunday as well and added a fried egg in the sandwich. I used gluten free bread (Udi's) for my sandwich and was surprised with how well it made a tender french toast piece.

If you are running out of ideas for your Sunday brunch, this is a simple and delicious recipe that will spice things up a bit! Turkey or bacon works just as well in the sandwich, too. Serve with home fries and you've hit a home run.


Monte Cristo

Ingredients:
2 pieces of bread (gluten free if necessary)
2 slices ham or turkey
1 slice of smoked Swiss cheese
1 egg
2 tbsp milk
dash of cinnamon
1 tbsp butter
Powdered sugar or maple syrup to serve

Directions:
  • Assemble sandwich (mayo optional) by placing ham and cheese between slices of bread. 
  • Scramble the egg with the milk and cinnamon in a wide, shallow bowl. 
  • Melt butter over medium heat in a skillet. Dip the sandwich in the egg mixture carefully, and turn to coat both sides fully and let it absorb a bit into the bread. 
  • Place sandwich in hot pan and let cook until it is golden brown and flip to repeat on other side. 
  • Serve with warm maple syrup or a dusting of powdered sugar.


February 11, 2016

Snickers, Peanut Butter Cups & Needhams


Ah, Valentine's Day. I'm not the overly romantic type but I can't pass up an excuse to celebrate with a nice glass of wine and a good meal.....And of course chocolate! I'm sure you can guess that as a food-obsessed human I always make yummy treats for friends and family on Valentine's Day. When I was younger I remember making homemade peanut butter cups and caramels with my mom, and I thought it would be really fun to try something similar this year.

My menu consists of homemade snickers, peanut butter cups and needhams. If you've never heard of needhams, then you probably aren't from Maine. They're a delicious potato-coconut candy dipped in chocolate, (I know, us Mainers and our potatoes....) and my boyfriend has been begging me to make them for a while now. I kept denying solely because I figured that mashing potatoes just to make candy seems like such a laborious step, when in all actuality it is a heck of a lot easier than many other decadent desserts I've made. Long story short, I caved in for Valentine's Day and am so happy I did.


The snickers are to die for. I've never made nougat before (I couldn't even have guessed what was even actually in it) but it is the most amazing thing in the world. It's sweet and chewy and really I could have just wrapped up chunks of nougat and I think people would have been satisfied..... But I can't deny that it's better nestled in a bed of chocolate, caramel and peanuts.


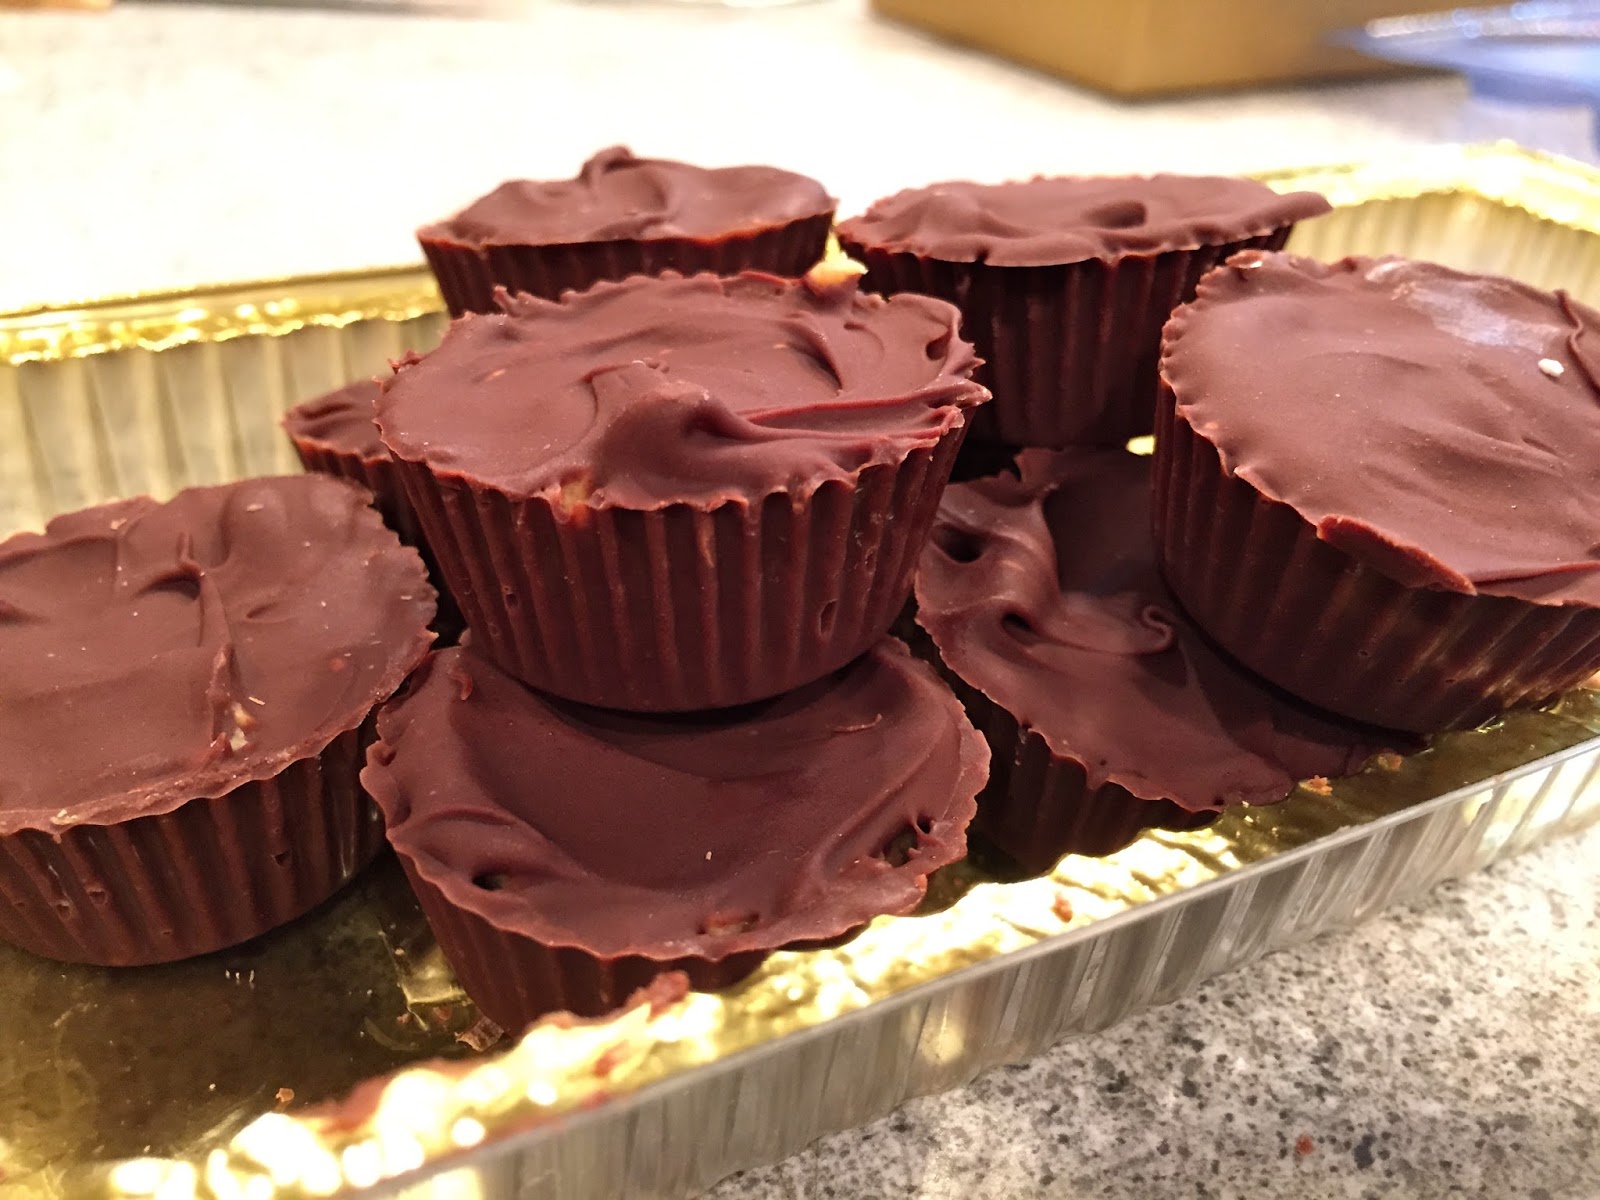
The peanut butter cups are just as delicious. The filling doesn't have that chalky consistency that Reese's have. It's the perfect combination of sweet and nutty (cue my grandfather saying "Just like you!"). I recommend using natural peanut butter for this.

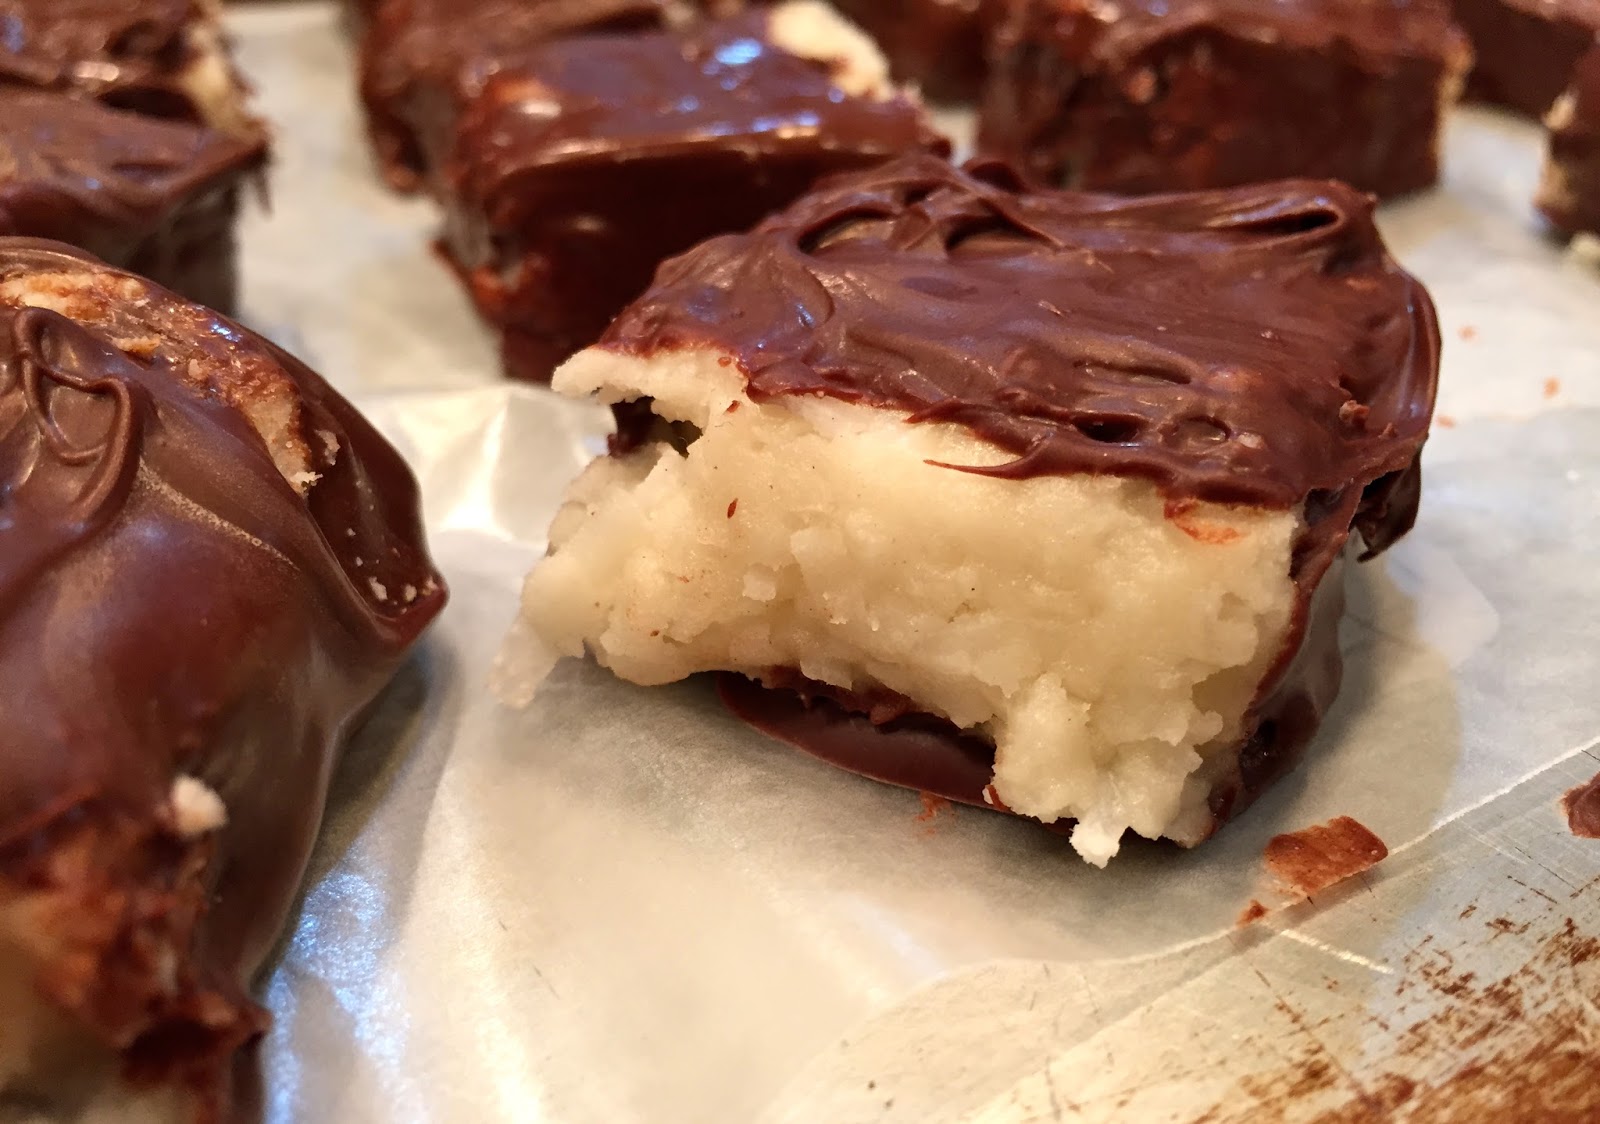
Lastly the needhams. If you're skeptical, think of a creamier kind of Almond Joy, minus the almond. (If you love almonds though, go ahead and throw one in there!) If you especially like coconut, you'll flip over this treat. They're chewy and sweet, and I promise you'll take a bite and immediately let out a beautiful sigh of satisfaction. They are slightly a pain in the butt to dip in chocolate and after making a million chocolates beforehand, I got a little lazy on that part which is why they aren't as smooth and beautiful as they could be. I'll leave that up to you!

It's so fun to make something homemade rather than just buy a box of chocolates, and your friends and family will love it. It isn't too much work either, unless you try and make all of the above at one time. Melting chocolate does get messy, so I recommend choosing one or making them on separate days. Store the treats in the freezer and they last a really long time!

Happy Valentine's Day!


***Pro tip - especially when making the snickers, clean your pans asap because sticky sugar and dried chocolate can be a bitch :)


Homemade Snickers

Ingredients:
3 cups chocolate chips
3/4 cup natural peanut butter
1/4 cup butter
1 cup sugar
1/2 cup evaporated milk
7 oz tub marshmallow fluff
1 tsp vanilla
1 1/2 cup peanuts
12 oz bag of caramels

Directions:
  • Line a 9x13 casserole dish with parchment paper. 
  • In a double boiler or microwave melt 1 cup of the chocolate chips with 1/4 cup of peanut butter and stir until smooth. Pour into the casserole dish and place in freezer.
  • For the nougat, put butter, sugar and evaporate milk in small saucepan. Melt on medium heat and stir occasionally until combined. When it comes to a boil, set a timer for 6 minutes. 
  • After 6 minutes, remove from heat and stir in 1/4 cup of peanut butter, fluff and vanilla and stir until smooth. Pour over the chocolate layer and place back in freezer.
  • For the caramel layer, melt the caramels and 1/4 cup of evaporated milk in a saucepan over medium heat until smooth - careful not to scortch it! Dump peanuts evenly over the nougat mixture than pour over the caramel. If peanut aren't salted, sprinkle some coarse see salt over the caramel. Return to freezer. 
  • Repeat the top chocolate layer the same as the bottom and pour on top and spread to cover. 
  • Freeze for a half hour to set and cut into squares. 
  • Store in the fridge or freezer, whatever your preference, but they will get soft on the counter! 


Peanut Butter Cups

Ingredients:
1 cup peanut butter
1 tbsp + 1 tsp butter, softened
1/2 cup powdered sugar
1/2 tsp salt
2 cups chocolate chips
4 milk chocolate candy bars (1.5 oz each)

Directions:
  • Combine peanut butter, powdered sugar, butter, and salt until smooth. 
  • In double boiler, melt chocolate chips and chocolate bars and peanut butter and stir until smooth.
  • In plastic peanut butter cup molds or paper lined mini muffin tins, add 1 tsp drop of chocolate (depending on size of tin - you want pretty thin sides) and use a small brush or spoon to spread up the sides to create the cup. Place in freezer for a few minutes to set. 
  • Add in a scoop of the peanut butter mixture and press slightly to flatten the top. Top with chocolate and spread to seal the top. 
  • Place back in freezer to set and store in freezer/fridge. 


Needhams

Ingredients:
3/4 cup mashed potatoes (no butter or milk or seasonings mixed in)
1/2 tsp salt
2 lb bag of powdered sugar
1/2 cup butter, melted
14 oz bag of sweetened coconut
2 tsp vanilla
2 lbs semisweet chocolate chips
3 tbsp vegetable shortening

Directions:
  • Butter a 12x15 (ish) jellyroll pan or large casserole dish.
  • Mix together mashed potatoes, salt, sugar, butter, coconut and vanilla until combined. Spread evenly over pan and place in the fridge to set for about a couple hours. 
  • Cut into small squares.
  • Melt chocolate in a double boiler and stir in shortening to combine. 
  • Use a fork to pierce the squares and dip into the chocolate mixture. Let the excess drip off or use another utensil to gently scrape the edges. Place on a wax paper lined baking sheet to harden. 
  • Store in the fridge.


February 9, 2016

Mongolian Beef & Broccoli

I first starting blogging about food my sophomore year in college. It was my first time living in an apartment and I was so excited to cook all of my own meals (people thought I was weird because of that). I cooked dinner for my boyfriend, and sometimes all the roommates, nearly every night and loved every second of it. That year I experimented with so many recipes, and many of those are some of my go-to meals even today.

"Mongolian Beef" was one of the first meals I made in that tiny apartment. It is a Chinese-American dish that is in no way a reflection of the food eaten in Mongolian culture, but nevertheless it tastes amazing. It's another one of my favorite make-at-home-take-out dishes (click here for General Tso's chicken recipe). I think PF Chang made the dish famous, but I'm confident this recipe could compete.

Sweet, salty & spicy........ If any dish is described as "mouth watering", this is it. 

I made it this past weekend, as seen in the photo above, and it brought back good memories of making a huge mess in a tiny kitchen in Orono, Maine. My twist on the take-out classic is that instead of using the "traditional" green onions as the veggie in the dish, I opt for roasted broccoli. Instead of rice I serve it over quinoa cooked in beef broth. Both the broccoli and the quinoa absorb the delicious sauce so perfectly, and add nutritional value.

Definitely use reduced sodium soy sauce, because otherwise you'll end up drinking a gallon of water to quench your thirst after the meal. A lot of Chinese-American dishes have a lot of soy sauce, so when mimicking a takeout meal, or in any recipe really, I always use the reduced sodium bottle.

Add as much red pepper as you'd like and load up on the broccoli to get your daily dose of veggies!


Mongolian Beef & Broccoli

Ingredients:
1 tbsp minced garlic
1 tsp fresh ginger
1 bunch of green onions, chopped fine
1/2 cup reduced sodium soy sauce or tamari
1/2 cup water
2/3 cup brown sugar (preferably dark brown sugar but light work fine)
pinch of red pepper flakes, or more to taste
1 lb flank steak, sliced
Pepper
1/4 cup cornstarch
1-2 large heads of broccoli, chopped and roasted or steamed

Directions:
  • Heat a couple tsps of oil in a skillet over medium heat. Add garlic, ginger and green onions and stir for about a minute, until fragrant. 
  • Add soy sauce, water and brown sugar and stir until sugar dissolves. Add red pepper flakes if desired and let sauce boil for a couple of minutes to thicken slightly. Remove from heat and set aside. 
  • Toss sliced steak in a bit of pepper and cornstarch and let sit for a few minutes to absorb.
  • Heat vegetable oil in a large skillet, about 1/2" thick covering the pan over medium-high heat. 
  • Fry meat in oil about 1-2 minutes each side depending on thickness, until edges are slightly browned and crisp, and remove with slotted spoon and set on paper towel lined plate. 
  • Remove excess oil from pan and return meat to pan with roasted or steamed broccoli and stir in the sauce. Bring to a boil and cook just a minute or so until the broccoli absorbs the sauce.
  • Serve over quinoa or rice.


February 5, 2016

Flourless Peanut Butter Cookies


Peanut butter cookies have always been one of my favorites since I was little. They are so simple but perfectly sweet and nutty; You really can't go wrong. I've made this recipe more times than I can count because it's so easy and I always have all of the necessary ingredients on hand.

You can have them completely done in 15 minutes flat to curb that craving asap!
They're the perfect consistency - a kind of dense, chewy peanut buttery cookie but tender at the same time. I highly recommend the sprinkle of coarse sea salt on the top before baking to make them extra tasty. You could get more creative as well and consider making PB&J thumbprint cookies with a scoop of jam in the middle, or dipping the cookies in a melted chocolate after they're cool.

I have nothing else to say besides these are equally as easy as a Betty Crocker mix but less processed and more delicious! It's great to throw together for a last minute dessert for company.


Flourless Peanut Butter Cookies

Ingredients:
1 cup natural peanut butter
1 cup sugar
1 egg
1 tsp vanilla
Coarse sea salt

Directions:
  • Preheat oven to 350
  • Scramble the egg and mix with peanut butter, sugar and vanilla until combined
  • Scoop rounded tablespoons of the dough and roll into a tight ball with your hands - if you don't do this they may come out crumbly
  • Place on ungreased cookie sheet and make criss-cross pattern with a fork
  • Bake for about 12-14 minutes, depending on the size of your cookies, or until edges are a bit golden.


February 1, 2016

General Tso's Chicken


One of my all time favorite Chinese take-out dishes is General Tso's Chicken. The cravings of the tender, crispy, sweet and spicy chicken can be so real that you actually can't control your fingers from dialing the memorized number of Asia Cafe down the street.

Unfortunately I'm kidding; I haven't dialed or even had Chinese takeout since I stopped eating wheat three years ago. The silver lining though is that I have become great at making homemade replicas that are just as crave-worthy and always MSG and gluten free. (My repertoire consists of orange chicken, fried rice, coconut shrimp, beef/chicken teriyaki, beef & broccoli, etc; Just to give you a sneak preview of what may be to come on the blog!)

I recently made this chicken for my boyfriend and his parents and we all LOVED it. It's one of those meals that inhibits your ability to even form words other than exclamations such as "wow" or "Mmmmmm".

I'll even go on a limb and say it is better than your favorite takeout place......

I made some fried rice to serve with it and it was such a satisfying, delicious meal. It's fun to make too, because it mimics your favorite restaurant and you feel so accomplished making it at home. You can compete with the pros! 


Just looking at these photos is taking me on a tasty time travel in my head and I can't wait to make this dish again. It would be a delicious snack to make for the Superbowl (bummed would be an understatement about the Pats but I still have faith in my team and the GOAT) and you can leave a pile of toothpicks for guests to pick pieces with. I'm confident, to say the least, it would all disappear before halftime.

You can alter the amount of red pepper to achieve your personal spice preference. The amount below was, in my opinion, a perfect balance of sweet and spicy. You could also use chicken breasts instead of thighs, but the thighs are usually more tender. Lastly, for a healthier version, you could avoid the dredging and frying and just cook the chicken in a pan and toss in thickened sauce - I prefer the frying though.... This is supposed to be a "take-out" treat!


General Tso's Chicken

Ingredients:
Oil for frying
1 egg, scrambled
1 1/2 lb chicken thighs, chopped to 1-2" pieces
1/2 tsp salt
1 tsp sugar
Pepper
1/2 cup cornstarch
For the sauce:
1/4 cup chopped green onions
1 clove garlic, minced
1 tsp fresh minced ginger
2 tsp orange zest
1/2 cup sugar
1/2 - 1 tsp red pepper flakes
1/4 cup chicken broth (or I used a dry hard cider)
1 tbsp + 1 tsp rice vinegar
1/3 cup reduced sodium soy sauce, or tamari for gluten free
3 tsp sesame oil
2 tsp cornstarch, dissolved in 2-3 tbsp of water

Directions:
  • Heat enough oil in a large skillet to cover the pan, about 1/2" deep over medium/medium high heat. Around 375 degrees. 
  • Toss chicken in egg and season with salt, sugar and a few dashes of pepper. 
  • Sprinkle cornstarch on chicken and toss to coat. It will look like a yellowish gooey coating - perfect. 
  • In batches, fry the chicken without overcrowding for 2 minutes on each side until they are golden and cooked through. Remove and place on a paper towel lined plate. 
  • While chicken is cooking, to make the sauce, heat a splash of oil in a small pot over medium-high heat. Add the green onions, garlic, ginger and orange zest and cook and stir for a minute or two (this will smell fantastic). 
  • Add in the red pepper flakes and stir for a few seconds, then add all remaining ingredients except for the cornstarch/water. Bring to a boil and cook for 3 minutes, then add in the cornstarch mixture and return to a boil to thicken. 
  • Toss the chicken in the boiling sauce and cook to heat through, just a minute or so.