Popular Posts

September 24, 2018

Banana Cream Pie w/ Coconut Crust


My dad is an old fashion kind of guy when it comes to food. He will eat literally anything, but he loves the simple retro stuff like meatloaf and potatoes, grilled cheese and tomato soup, beans and hot dogs, and ketchup is acceptable on just about anything. He's easy to please, lets just put it that way, but I always have a lot of fun coming up with a dinner and dessert combo for his birthday. One of his favorite desserts is banana cream pie, which is seemingly outdated but ended up shocking me as one of my favorite desserts I've had in a long time. I avoided any pudding mix and made it the old fashion way from scratch, with a couple twists on it that made it totally outstanding. My entire family was head over heels in love. My brother said it was "f*&%ing amazing."


I made the crust out of Nilla Wafers and coconut, filled it with fresh cut bananas, and poured a homemade custard on top with a hint of vanilla. I served the pie with whipped cream and a drizzle of (you guessed it!) Stonewall Kitchen Bourbon Pecan Caramel Sauce and honestly it exceeded my expectations by a long shot.


I am in LOVE with this pie, and my dad was actually speechless. He had two pieces of pie, after he had two meatball subs I made him for dinner. Super healthy birthday dinner, if I do say so myself. You only turn 62 once!


Banana Cream Pie w/ Coconut Crust

Ingredients:
For crust:
40-45 Nilla wafers (or other brand vanilla wafers)
1 cup shredded coconut
2 tbsp sugar
6 tbsp melted unsalted butter
1/4 tsp salt
For filling:
3 bananas, cut into small slices
3 cups whole milk
1/3 cup flour
3/4 cup sugar
1/4 tsp salt
3 egg yolks, slightly beaten
1 tsp vanilla
2 tbsp melted butter
For serving:
Whipped cream
Caramel sauce (my recommendation: Stonewall Kitchen Bourbon Pecan Caramel Sauce)

Directions:

  • Preheat oven to 350 degrees.
  • Pulse vanilla wafers, coconut and sugar in food processor until fine and stir in melted butter until evenly distributed. Press the mixture firmly and evenly into uncreased pie pan and bake 16 minutes or until golden. Let cool slightly then place in fridge to cool completely before filling.
  • Scald the milk in large saucepan (heat over medium low in saucepan until it is steaming and has small bubbles around the outside but is NOT boiling). 
  • While milk is scalding, mix together the flour, sugar and salt in another saucepan. Slowly stir in the scalded milk and place this saucepan over the heated stove and cook over medium heat, stirring constantly until it has thickened. Cover, stirring once or twice, for another two minutes. 
  • Temper the eggs by adding a small amount of the heated milk mixture to the egg yolks and stir to bring them up to temperature, then add the yolks to the milk mixture. Cook for another minute or so, stirring constantly.
  • Remove from heat and stir in the butter and vanilla and let sit until lukewarm. You can place in bath in the sink with cool water to help speed this process. 
  • Place the sliced bananas evenly on the cooked pie crust and pour the custard mixture over bananas. Let it set in the fridge until ready to serve, and top with whipped cream and caramel. 


My family celebrating my dad's birthday at Shauna's new house! (We didn't have the pie here, Shauna cooked up this dinner and we had the subs and pie at my parents house after the Sunday Pat's game)


September 16, 2018

Buttery Soft Pretzels


This blog is very much on the back burner, where it will likely stay forever, and that’s kind of where I want it. I don’t like to cook with the intention of blogging – I cook with the intention of eating. I never measure anything and I always adjust to taste, so it is hard for me to take my time and write an exact recipe that works perfectly for anyone other than myself. With that being said, sometimes you nail a recipe and you do measure and you need to save that recipe because next time you make it you want it to be EXACTLY the same. So here are these soft pretzels….


I’ve made soft pretzels a number of times and these are by far the best ones and the only recipe I ever want to make again. They are buttery and pillowy soft and tender and salty and are just like the ones you’d get at the mall when you were a miserably reckless 12 year old. Good times. I’m very confident that these actually could not be any better.

I served these with spicy honey mustard, but any mustard or cheese dip would do.


These pretzels are great with coarse salt, but they would be fantastic as a sweet treat with cinnamon sugar as well. Or you could even go savory with Italian herbs and garlic. Or maybe even mix shredded cheddar in the dough. Yup, this recipe is a definite keeper. I like mine thick and chunky but you could stretch them out a bit more for thinner and larger pretzels. 


Buttery Soft Pretzels

Ingredients: 
1 cup milk (I used almond milk)
2 1/4 tsp active dry yeast
3 tbsp brown sugar
2 1/4 cups flour
2 tbsp melted unsalted butter + more for brushing on finished pretzels
1 tsp salt
1/3 cup baking soda
3 cups warm water
coarse salt 
Directions:
  • Microwave the milk to warm it and stir in the yeast. Let it sit for a couple of minutes or until it begins to froth, then gently stir in the sugar and 1 cup of the flour, then the melted butter.  Slowly add the remaining flour until it is a combined sticky dough. Add more flour if needed to create a ball.
  • Lightly grease a large clean bowl, place the dough inside, cover and let sit to rise for about an hour or until the dough has doubled in size.
  • Line a baking sheet with parchment paper, lightly spray and preheat the oven to 450.  
  • Dust a work surface with flour and punch down the dough to deflate it. Flour your hands for easy handling and put dough on work surface. Cut into six pieces, and roll each piece into a rope. Stretch it by swinging it like a jump rope slapping it on the counter. Form each pretzel into shape. Dissolve baking soda in warm water. Dip each pretzel in water then place on baking sheet. Top with a generous sprinkle of sea salt and bake 10-12 minutes or until golden. Brush with melted butter. 


August 8, 2018

Green Curry w/ Chicken - Gaeng Keow Wan Gai


Next Thai curry recipe is up and I promise there is plenty more coming! Green curry (Gaeng Keow Wan) is a fan favorite of both local Thai people and tourists alike. As with many other kinds of curry, I ate more bowls of gaeng keow wan than I could ever try to count. Green curry paste has similar ingredients to red but it uses young green chilies (instead of dried red ones) which, along with kaffir lime leaves and basil lend to its vibrant color.


I was pumped because my boyfriend had green curry in the past he didn’t like too much, but he absolutely loved this one. It really tasted spot on to the green curries I had in Thailand which made my heart sing. I think it was about as close as you could possibly get without making the paste from scratch with fresh ingredients sourced that day, as is often done in Thailand which is just a dream come true. Traditionally in Thailand they use Thai eggplants which are about golf ball size and tiny bitter eggplants, but for sake of using what is in season and accessible here, I use other veggies – green beans, snow peas, bell peppers, broccoli, etc.


Just like most Thai curries, this one has a balance of sweet, sour, creamy and spicy – palm sugar, fish sauce, coconut milk and chilies. It’s floral and herby from the lemongrass and other spices in the paste and fresh basil which makes it fragrant and extra delicious. The flavors go super well with any protein you choose, from tofu to chicken to pork or seafood.


The same tips apply from my khao soi recipe, and any other curry for that matter. It is important to cook down the 3/4 cup coconut milk to separate oil in the first step. Use a good quality coconut milk and good quality curry paste – Mae Ploy or Maesri are the best. You can use any vegetables that you prefer but be aware of when you add them to the curry as different vegetables cook at different rates and you want them to remain crisp-tender (or whatever your preference is). For green curry, I like to use mostly green vegetables because it keeps the color bright and pretty! But you could use whatever you have on and and I promise it will be delicious!


Another tip I learned that is great for having super flavorful protein in the curry is to marinade it in just a couple tsp of fish sauce while you prepare the other ingredients. If you’re using seafood, only toss it together just for a bit because it will absorb flavor much quicker.


Thai Green Curry with Chicken (Gaeng Keow Wan Gai)


Ingredients:

1 can good quality coconut milk

4 1/2 tbsp green curry paste

1 2/3 cup low sodium chicken stock

1 ½ lb chicken thighs or breasts cut into bite sized pieces against the grain

3 tbsp palm sugar

2 tbsp fish sauce + 2 tsp

4-5 kaffir lime leaves, torn to large pieces

4 cups green vegetables of choice (bell peppers, green beans, snow peas, broccoli, onions, etc)

1 heaping cup thai basil

1 sweet red chili, sliced thin for garnish

(optional 1 tsp yellow curry powder for additional flavor)

Jasmine rice to serve


Directions:
  • In pot over medium/med-high heat, reduce ¾ cup coconut milk until it has thickened and oil have separated from coconut milk (if oil doesn’t separate, it’s okay just reduce til thick and continue). Add curry paste and stir constantly until it is fragrant and has darkened slightly.
  • Add chicken pieces and stir to coat. Add remaining coconut milk, chicken stock, palm sugar, fish sauce and lime leaves. Bring to a simmer and cook for about 5-10 minutes, then add vegetables strategically so as you don’t overcook ones that cook quickly. Simmer about 10 minutes more or less, or until vegetables have reached desired doneness.
  • Taste sauce and add fish sauce and/or a tsp of yellow curry powder (not traditional but it works well if flavor isn’t quite there!) if needed.
  • Remove from heat and stir in Thai basil.
  • Serve with rice and garnish with red chilies.


July 24, 2018

Ode to Khao Soi


The food in Thailand changed my life. The best meals I have ever eaten were all in that country and they will influence the way I cook Thai food at home forever. Fish sauce is my best friend, dark soy sauce can’t be substituted, kaffir lime can’t be omitted, palm sugar is gold and lemon grass and tamarind make me weak at the knees…. and of course Thai chilis are FIRE. I get emotional just thinking about the magic that those people create behind tiny roadside stands with the biggest smiles spread across their faces…..That is what food is all about!


Khao Soi is a coconut curry noodle soup from Northern Thailand with Burmese influence and it’s slightly less common to see at Thai restaurants in the US. If it is in one, I have yet to see it made authentically like how it is served in Thailand – over egg noodles with tender bone-in chicken, topped with pickled mustard greens, shallots and crispy fried noodles. I ate countless bowls of this abroad and have perfected the recipe at home to get as close as possible to what I remember as being one of my most favorite meals living in Thailand. I have made this with a homemade curry paste, but I wanted to get a recipe down that was more simple for a weeknight meal.

The goal is to have a final dish that is well balanced - spicy, sour, sweet, salty and creamy all in one delicious bite. It really doesn't get much better than this. There isn't really a "khao soi" curry paste on the market that I am aware of, so the way I found to get the right flavor is to use red curry paste then add 2 tsp of curry powder. The curry powder I use is from India and it brings another element of flavor that makes it more authentic. It is traditional in Thailand to have bone-in chicken in this dish, but if you'd prefer it to be a bit easier to eat, you can shred the chicken off the bone before serving in bowls. I think bone in, skin on chicken adds so much flavor to the dish so I prefer not to use any other kind!


One place in particular stands out as easily the best Khao Soi I ever ate and it also may have been the best thing I ever consumed in my entire life. Shauna was visiting and we were driving via motorbike from Chiang Mai to Pai and we stopped at some random restaurant about an hour from Pai (to take in the scene, imagine gorgeous rolling hills and mountains cut with winding roads and dotted with tiny mom n’ pop style nameless restaurants with countryside views.…this is my heaven, I swear). Shauna and I sat and ordered their homemade kombucha made from tea leaves grown right behind the shop and two bowls of Khao Soi. This all together costed under $5 (with fresh melon for dessert)……TAKE ME BACK I TELL YOU!!!! When the sweetest woman brought over our steaming bowls, we took our first bites and just started laughing. It was the greatest thing either of us had ever tasted and we were instantly so deeply in love.

See below for photos of us thoroughly enjoying Khao Soi in Thailand - never to be forgotten!


If you go to Chiang Mai or elsewhere in Northern Thailand and you don’t try a bowl of Khao Soi from a nameless restaurant with plastic chairs and flies everywhere and fish sauce and chiles that look like they’ve been on the table for two years, you’ve made a huge mistake. You can’t miss this dish….actually you just can’t miss this country in general. Go to Thailand. Eat everything.


A few tips before you get cooking:
  • Ingredients matter! I hate to publicly shame a brand but please don’t buy any Taste of Thai products. They are so inferior and Americanized it’s pathetic and you’ll never get the right flavor. If you want to cook real Thai, go to your local Asian market and buy the good stuff. Aroy-D coconut milk, Maesri or Mae Ploy curry paste and the fish/soy/oyster sauces that have hardly any English on them, if any.
  • Buy palm sugar if possible. You can substitute brown sugar but it’s just not the same.
  • Not all curry powders are the same! If you read the actual spices on the labels, the ingredients and quantities of ingredients are all different which leads to a different flavor. Smell them, taste them, find your preference and buy a good quality one. 
  • The garnishes on this dish are necessary in my opinion. Find pickled mustard greens at your Asian market in a kind of vacuum sealed bag – Portland people, Veranda Asian Market on Forest Ave has literally everything.
  • An important step in the curry cooking process is to separate the oil from the cream in the coconut milk. This allows for a thin layer of oil floating on top of the curry at the end which brights out the color, glistens and coats your lips in the spice. Very important, so don't skip! 


Khao Soi
Serves 4


Ingredients:

4 large bone in, skin on chicken thighs
1 can good quality coconut milk such as Aroy-D
1 4oz can red curry paste*
2 tsp curry powder
4 tsp fish sauce (more or less to your taste)
1 1/2 cup low sodium chicken broth
2 tbsp palm sugar
12 oz Chinese style egg noodles
One juicy lime
Pickled mustard greens
Two shallots sliced thin
Cilantro
Chow mein noodles**


Directions:

  • In large wok or pot, heat 1-2 tbsp of oil to medium-high heat. Remove any unnecessary excess skin from chicken and season with salt and pepper. Place skin side down in pan and cook for 3-4 minutes to brown and crisp the skin. Remove from pan and set aside on plate. Scrape any bits from the bottom of the pan.
  • Take 2 tbsp of the thick cream that sits atop the coconut milk and put into pan. Stir frequently and let it simmer until you see oil separate from the cream, about a minute. Add the entire can of curry paste and stir until you see it darken in color and oil glistens, about 2 minutes. Slowly stir in the remaining coconut milk, chicken stock, curry powder and palm sugar.
  • Add the chicken back to the pan and simmer, turning chicken occasionally, for 30 minutes or until chicken is super tender and broth is flavorful - Season to taste, add more curry powder/salt and pepper if desired. Season to taste with fish sauce – 4 tsp is perfect for me, you may want less. Cover the pot at the lowest heat setting and let sit while you cook the noodles.
  • Bring pot of salted water to boil and cook egg noodles to al dente. Drain and divide in four bowls. Top with one chicken thigh, divide the broth evenly among bowls and top or serve with a thick lime wedge (could have extra lime because I love lots of lime!), chopped pickled mustard greens, shallots, cilantro and chow mein noodles.


*Some curry pastes are spicier than others. I find mine is perfect but you may want to add additional spice at the end
**Traditional Khao Soi is topped with fried egg noodles. I use a short cut and top with store bought chow mein noodles instead to save time


I love this photo because it is my sister and I driving the motorbike after we finished our meals and we were pumped that the food was so amazing and we were singing The Doobie Brothers at the top of our lungs speeding down winding roads :) The best memories!

June 16, 2018

Fluffy Chocolate Chip Waffles


This is not Asian food (I do cook other things though I also eat curry for breakfast), but I haven't had waffles in probably a year and the craving kicked in on this slightly hungover morning. In the past I have made gluten free waffle variations, which have been delicious (in particular the vegan banana coconut waffles, click here) but these wheat packed ones are also BOMB and made with more accessible, affordable ingredients..... and chocolate chips :)


This recipe is a traditional style with a classic homemade flavor - probably how your grandmother would have made them. They're light and fluffy because you're gently folding in whipped egg whites, slightly aromatic from a hint of vanilla and a super special treat scattered with chocolate chips. You can whip these up in just a couple minutes and they're pretty fool proof. I like mine pretty crispy on the outsides so I let them cook up well in the waffle iron and keep cooked ones warm in a low heated oven while I make the rest.


Fill your tummy, cure your hangover, put a smile on your face and start your day right! Not necessarily the healthiest thing on planet earth but one thing I've learned recently is life is too short and I plan on enjoying every second.


Fluffy Chocolate Chip Waffles
Makes 6-8 waffles


Ingredients:

1 1/3 cups flour
1/2 tsp salt
2 tbsp sugar
1 tbsp + 1 tsp baking powder
2 eggs
1/2 cup (1 stick) butter, melted
1 3/4 cups milk
1/2 cup chocolate chips

Directions:


  • Whisk together dry ingredients in mixing bowl. 
  • Separate the eggs; Add the yolks to the dry ingredients and put the whites in a separate mixing bowl to beat to fairly stiff peaks - you can do this by hand pretty easily so don't worry about breaking out the mixer. 
  • Add the melted butter and milk to dry ingredients & egg yolks and stir to combine. Fold in chocolate chips.
  • Gently fold in the egg whites into the mixture. 
  • Depending on the size of your waffle maker, scoop about 1 cup of the mixture into the hot iron and cook 3-4 minutes or until done.
  • Serve with sizzzzurp. 


June 13, 2018

Mango Sticky Rice


It may come as a shock to some of you, but I lived abroad for 9 months WITHOUT A KITCHEN. I felt like a limb was missing off of my body at times, but luckily I was able to manage, mainly because going out to eat is so cheap in Asia and I was able to weasel my way into a few kitchens for cooking lessons. I was endlessly inspired by the balance of flavors, spices, colors and freshness of ingredients and I learned so much about Asian cuisine that will change the way I cook at home forever! Before returning back home to the US from India, I had to remove about half of the clothing in my backpack (priorities) in order to fit a a bag bigger than a toddler stuffed with nearly $100 worth of spices I bought in India. When my boyfriend picked me up at the airport I think he could smell me before he even saw me!

I wanted to first post a recipe for Mango Sticky Rice because it was easily my favorite Thai dessert. The fruit in Thailand is out of this world and the mangoes blew my mind - they are perfectly sweet and melt in your mouth like butter and taste amazing paired with the chewy and warm coconut sticky rice. I craved this literally every single day I was in Thailand. You could buy it at nearly any food market for 30-60 baht (just over $1), generally from a Thai person with a massive smile on their face sitting behind a cart piled high with beautiful, deep orange/yellow mangoes and a massive pot of aromatic sticky rice. Often there is even a drizzle of sweetened coconut milk to finish it off, and if you're super lucky, maybe some toasted mung beans for a little crunch. Some people even dye the rice a light blue by cooking it with butterfly pea flowers, which looks amazing next to the bright yellow mango slices. It's such a simple and fresh dessert, and it's healthier than many highly processed desserts we have in the US - not saying I don't love those as well :)


The best way to cook sticky rice is with a bamboo steamer (see note at bottom***). Before I had even arrived back to the US, I actually ordered a traditional bamboo rice steamer to my house off Amazon because I wanted to make this dessert asap after I returned home. That's love. If you are into sticky rice (or if you aren't, but trust me when you try it you will be) then you should absolutely order this. It's not expensive and you can make sticky rice for sweet and savory dishes - such as rolling a ball of it between your fingers to dip into a thick curry.....ugh. Sticky rice was one of my favorite discoveries in Asia as it is not generally available in my Thai restaurants at home and I am so happy I can now cook it easily for family and friends!

Another key thing I learned in Thailand is what products Thai people use for their cooking. Gift, my favorite Thai chef who taught me so much, showed me that Aroy-D is the best coconut milk to buy. You can find cartons or cans in the Asian market and from what I've tested it's the best quality with a true, creamy coconut flavor that works so well for this dessert and in curry dishes. Palm sugar isn't 100% necessary for this recipe and you can substitute brown sugar, but I use palm sugar that I bought at my Asian market which I love.


The glamorous and high tech bamboo rice steamer in action!


The most important part for this dish is the mangoes, so choose yours carefully! You want a mango with creamy flesh and not many stringy fibers, so your mango should be super ripe. Ideally the mangoes you want are the varieties grown in Asia which are known for these qualities and they are fully yellow in color. If you can't find these, then mangoes from Florida or Mexico with the greenish/reddish/yellowish skin are fine as well, as long as they are very ripe!

I've made this dessert multiple times and for three taste testers who had never had it before. They were weirded out by the idea of it at first, but as soon as I served it to them they all agreed it may have been one of their favorite desserts they have ever had.....and they're addicted to the sticky rice now too. I will be making this dessert for friends and family for the rest of my life and it will always remind me of my glory days living in Thailand, my favorite place in the world! Make sure if you decide to make it you prepare in advance by soaking the rice for at least 4 hours before steaming - this is necessary for that amazing chewy texture!


Mango Sticky Rice
Serves 4


Ingredients:
1 1/2 cups uncooked sweet/glutinous rice
1 cup coconut milk
3 tbsp of palm sugar (if you like it sweet, add more)
1/4 tsp salt
2 mangoes, sliced or cubed

Optional sweetened coconut topping**:
1/3 cup coconut milk
2 tbsp palm sugar

Optional toasted sesame seeds or mung beans for topping

Directions:

  • Put sticky rice in bowl and cover with 2 inches of cold water. Soak at least four hours or overnight.
  • Use bamboo steamer to cook sticky rice, about 30 minutes until translucent, tender and chewy. 
  • While rice is cooking, bring 1 cup of coconut milk, palm sugar and salt to a boil in small saucepan then simmer and stir to dissolve sugar. Set aside and keep warm. 
  • Once rice is done cooking, remove from bamboo steamer and place into bowl. Pour in the coconut milk mixture and stir to coat the rice. Cover to keep warm and let sit for a few minutes for the rice to soak up the coconut milk.
  • If you want an extra sweet topping, now simmer the 1/3 cup coconut milk and palm sugar in small saucepan for a minute or two until thickened slightly. 
  • To assemble, use a measuring cup to pack a scoop of the rice on a plate, topped with mango and the sweetened coconut milk. 


**I don't generally make this because I think it is sweet enough without it but it is typically served with mango sticky rice in Thailand


December 16, 2017

Holiday Favorites!


I has been a super long time since I've written in this blog because I've been abroad, but I wanted to share some of my favorite recipes I've posted in the past that are great for the holiday season! This way, if my friends and family at home are missing my cooking, they can at least make some of my recipes so it tastes like I'm home for the holidays :) I'm going to have to go all out next Christmas to make up for lost time, and you can bet there will be a Thai twist on a lot of it!

My holiday food lineup is listed below and the links to the recipes are below the pictures. I have many delicious things which never made the blog as well, so if you're stuck on Christmas recipe ideas, feel free to message me. I'm brainstorming like crazy over here in Thailand without a kitchen!!


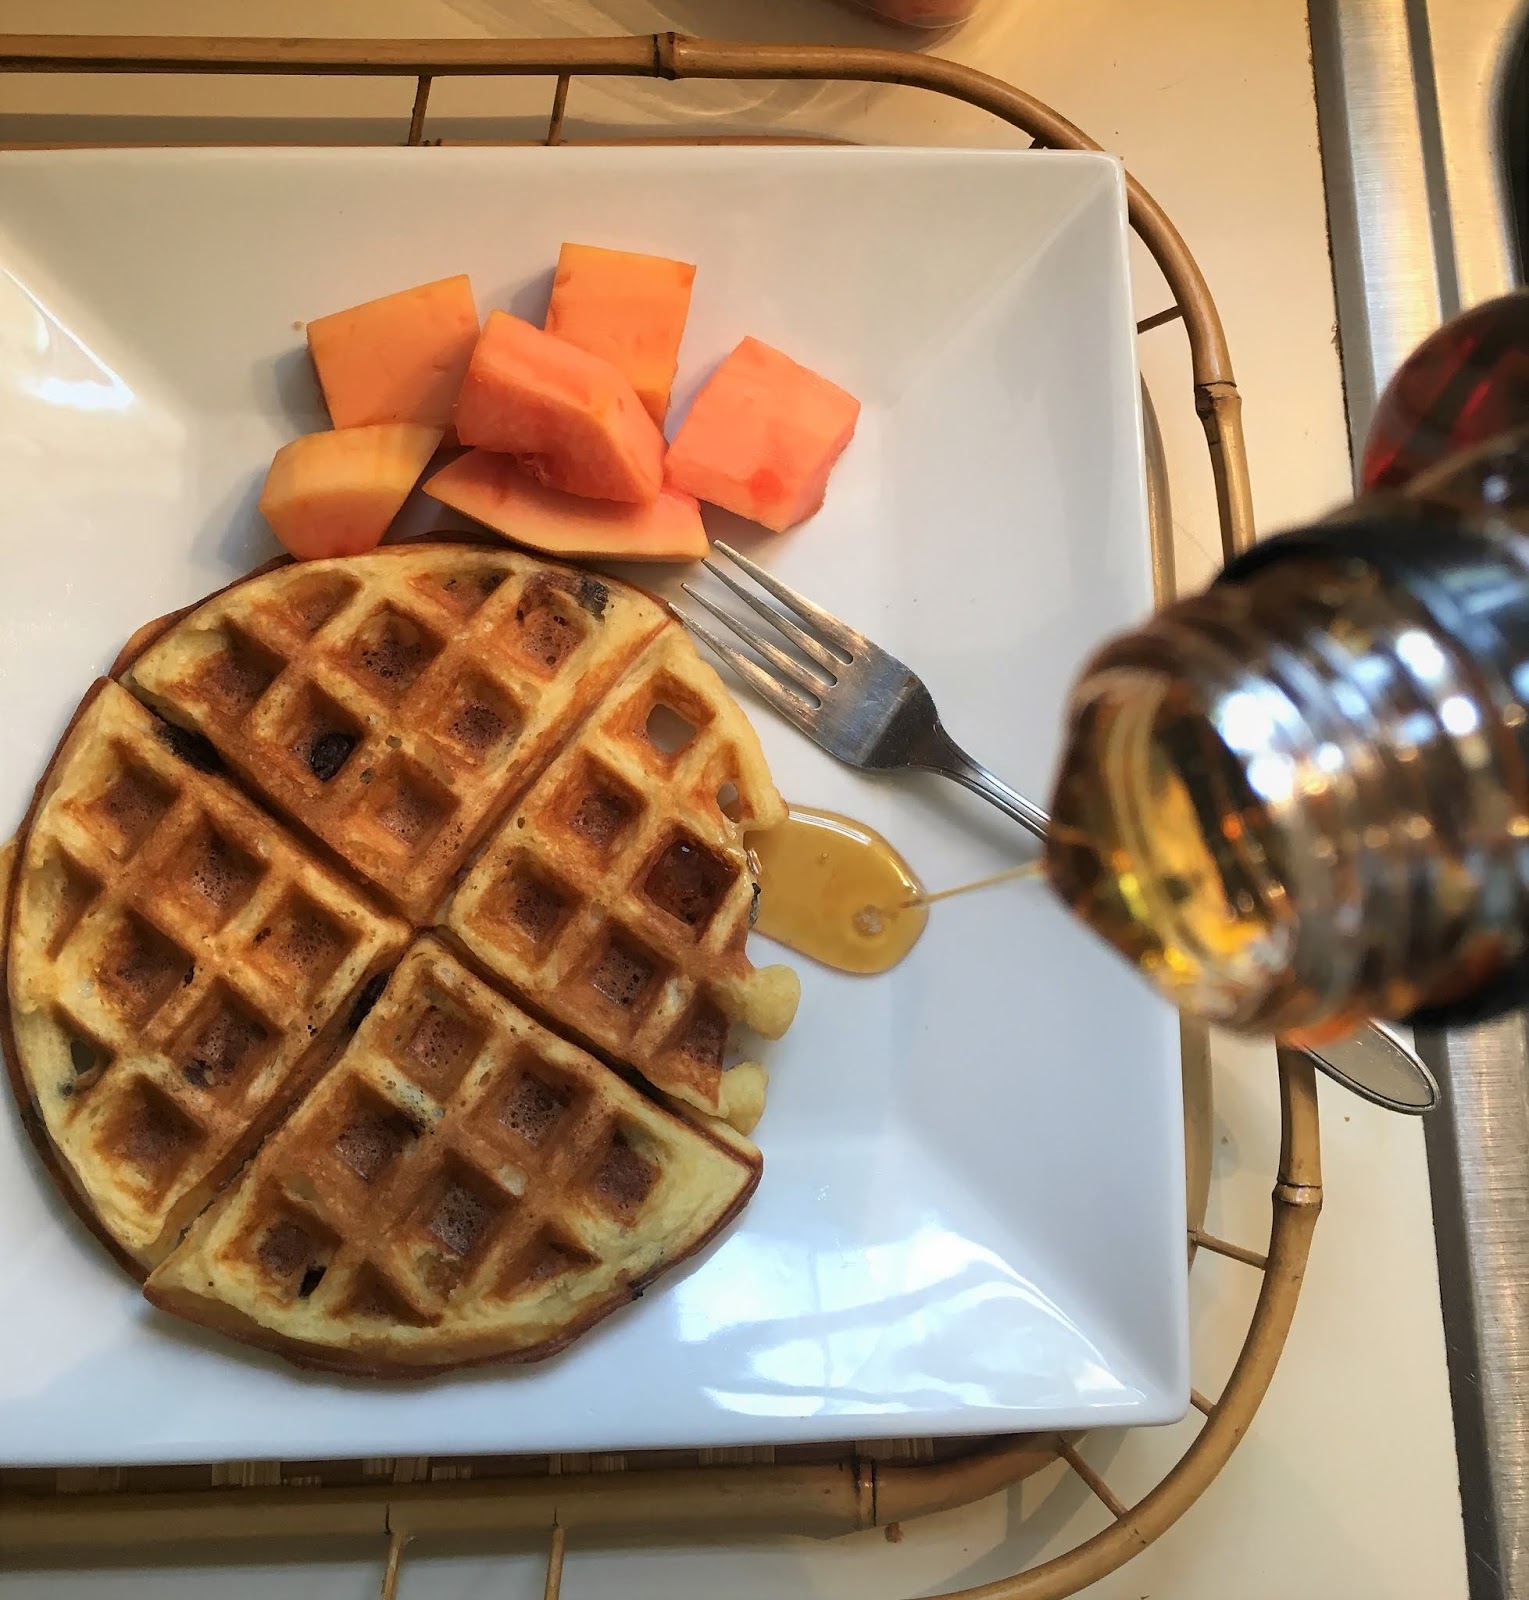
Vegan Banana Coconut Waffles


I sure will miss making Christmas brunch this year! These waffles were sooooo good and I made this recipe many times post Christmas. Healthy, hearty, sweet, delicious and perfect for a special occasion that fulfills most any dietary requirement! One of my faves :) Click Here!


Corned Beef Hash

Another brunch menu item - typically the star of the show in my opinion! Homemade hash loaded with corned beef - top with a poached egg and hollandaise, put the leftovers in a quesadilla or eat drunkenly over nachos! Whatever you do it's all appropriate Christmas celebration to me! You can't go wrong with this crowd pleaser. Click Here


Sour Cream Coffee Cake

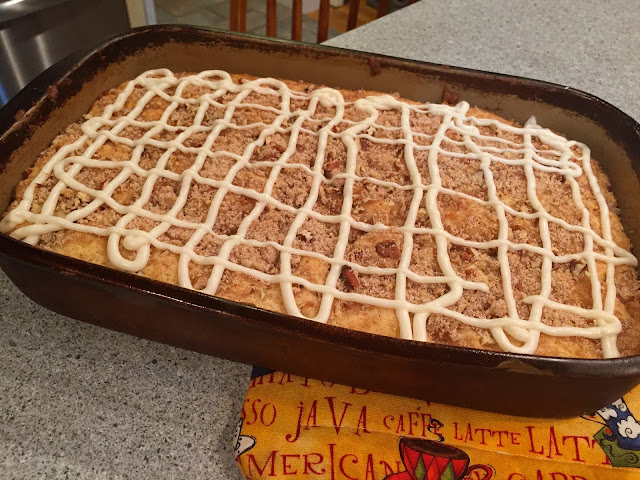
Coffee cake is my jam. It is perfect as a special breakfast treat or a simple dessert. This cake is Grandma style with that homemade from scratch flavor a box mix will never provide, with a generous dose of crumb center and topping. I love this around the holiday season. It's nostalgic to me because it's one of the first things I made when I started obsessing over cooking way back in middle school. Sour Cream Coffee Cake


Breakfast Pizza

I've made more breakfast pizzas in my life than I could ever count. All through college it was my go to affordable meal. This is a fun addition to brunch, an easy breakfast to throw together to serve a crowd and can be altered based on whatever is in the fridge. Most importantly it's a great hangover breakfast if you had one too many Christmas cocktails if you know what I'm sayin' :)  Click Here


Buffalo Chicken Deviled Eggs

A crowd pleasing, retro hors d'oeurve with a twist! I love these buffalo chicken deviled eggs - a nice mild spice everyone will loved, topped with a crispy fried chicken skin if you're feeling ambitious, not completely necessary though. There is also a recipe in this post for my favorite classic deviled eggs with a hint of curry for warmth. Click Here


Cheesy Smoked Mozz Stuffed Shrooms

This picture is so unattractive but it's all I've got.....don't be deceived. I am the self named queen of stuffed mushrooms and these are honestly gold, oozing with cheese and a delightful crunchy topping. Smoked mozzarella adds great flavor and sets these apart from other stuffed mushrooms. They are so addicting and everyone who I've ever made them for asks for the recipe. Click Here

Honey Chipotle Chicken Wings

These chicken wings are great for an app to feed a crowd because they are baked so you can cook up a decent amount easily. By following the instructions you get super crispy wings and this sauce is killer. Great for parties or for football games! Click Here


Brined Rosemary Pork Chops w/ Red Wind Vinegar Cream Sauce 

Throwing a dinner party and not sure what to make? Pork chops are an affordable cut of meat that can be made so delicious. This brine makes it fool proof for tender meat and the sauce is delicious. I love this dish! Serve with mashed sweets and brussels and you've got a solid holiday meal worthy of a crowd. Click Here


Braised Beef Shepherd's Pie

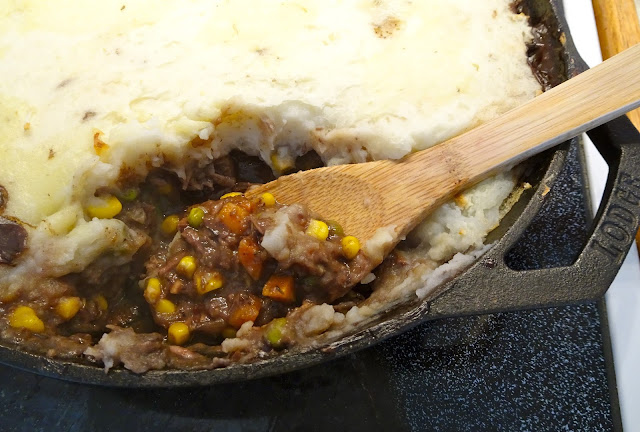
If you ask me to think of a comfort food, this is probably the first thing that comes to mind. Perfect for chilly weather and a fairly simple dish that can feed an army. Braising the beef in red wine adds great flavor and dresses up this old classic perfect for the holidays. Ugh I miss this one! And my well loved cast iron <3 Click Here


Braised Short Rib Pasta Sauce

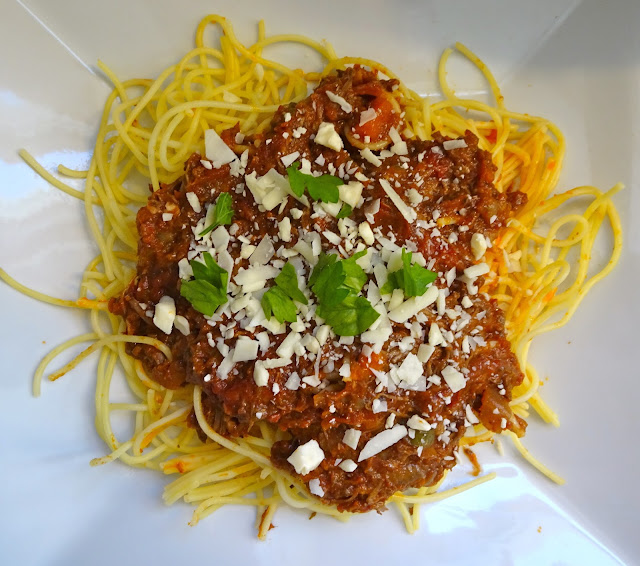
This is a great crock pot meal that takes minimal effort but is so flavorful. Nothing beats a homemade pasta sauce; another comfort food classic. Serve with a homemade caesar and garlic bread and sleep like a friggin baby. One condition is it must be served with multiple glasses of red wine for maximum holiday cheer. Click Here


Spinach Steak Salad w/ Caramelized Onions, Apples, Blue Cheese & Bals Dressing

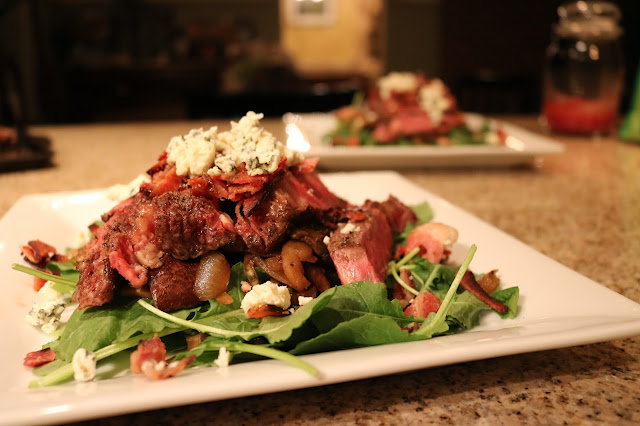
Comfort food in salad form. People don't generally crave salads when it's 0 degrees out but if it's a warm salad with ribeye, bacon, blue cheese and a honey balsamic dressing.....ahhh I want that any day. Idk why this feels like a festive salad to me so it's included in the recipe lineup. Click Here


Honey Sage Roasted Root Vegetable Salad

Roasted root vegetables remind me of the winter season because my mom always used to cook them so often. This salad is a great side dish to any protein main. It's colorful, beautiful and I love the flavor of sage around the holidays. Click Here


Tater Tot & Brussels Sprout Casserole

I have no idea how I came up with this one but you can probably guess my mindset at the time haha. This is so good and will please your inner child because....tater tots. Great for brunch or as a funky side dish to a potluck dinner party. Everyone loves this one! Click Here


Creamy Chicken and Charred Veggie Chili
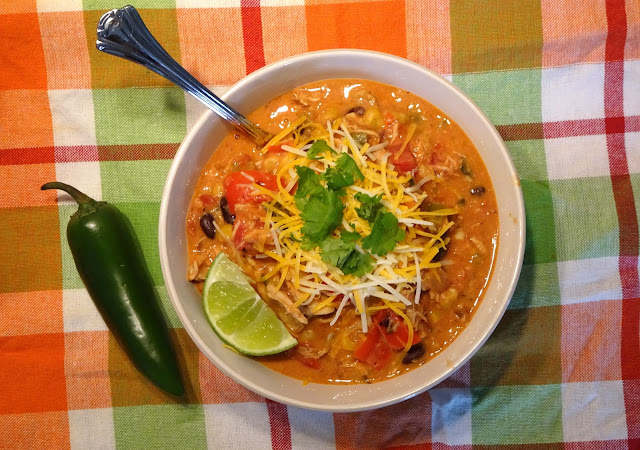
This chili is perfect to warm up with. It's great to have in a crockpot for any family gathering, potluck, football game or just a simple weeknight dinner. Damn I miss this one! Click Here


Raspberry Almond Thumbprint Cookies

I made these for clients at my old job and it was a huge hit. They are a classic holiday cookie - buttery, sweet and delicious with a hint of almond. Click Here


Cheese Danishes

This is the perfect treat to impress your family and friends with something insanely delicious and indulgent. The dough takes a bit of time but it's so worth the amazingly tender, buttery, flaky outcome. I include recipe for a brown sugar cinnamon filling and a classic strawberry. This recipe is the best danish ever and people go nuts over them. Click Here


Caramel Delight Cupcakes

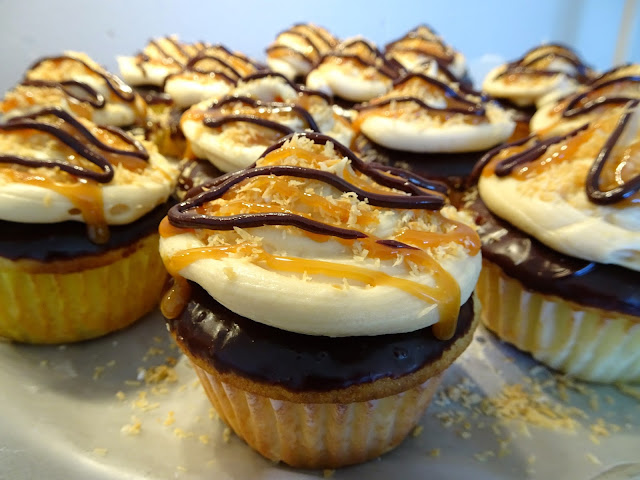
Gahhhhhh you're in charge of bringing a dessert and want to do something a lil fancy, eh? These are perfect. Gorgeous cupcakes with the most amazing flavor - rich chocolate ganache, caramel buttercream, toasted coconut. You're everyone's favorite now. Click here


Homemade Oreos

Be the star of the cookie swap (never been to one of those - sounds fun but also not) with these babies. Never had a homemade oreo? Like the boxed ones on crack. Cripsy yet chewy and sweet and rich chocolate. Click Here


Maple Pecan Cake w/ Cream Cheese Frosting

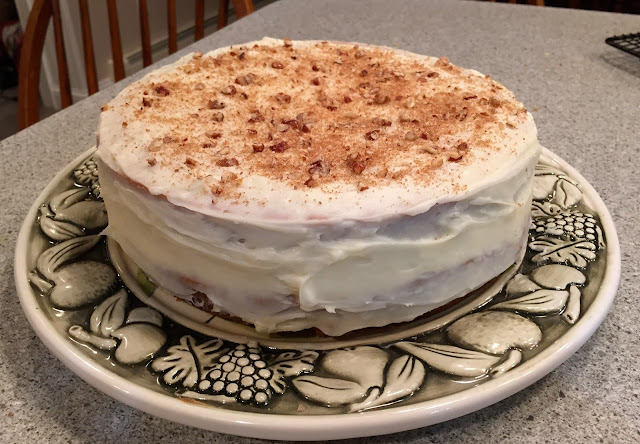
Anything with maple syrup and I'm in. This is a great festive cake that's simple to make but has great flavors - I've made it a bunch of times since posting the recipe and it always reminds me of the holidays. Perfect for a New England winter :) Click Here


Homemade Snickers, PB Cups and Needhams


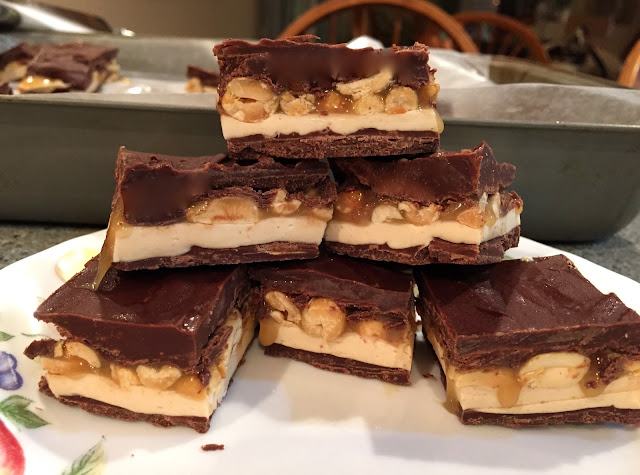
Over the past couple years I started making candies for the holidays or other celebrations. Snickers from scratch might be some of the most fantastic things on earth and people have rarely had them before so you instantly blow their socks off. Needhams, a classic Maine dessert, is another fun one that people love. Lastly, peanut butter cups are a unanimous crowd pleaser that is simple but a unique item on the holiday dessert table. Can't go wrong with any of these! Before I left for Thailand I made a bunch of needhams and froze them for my boyfriend for the holidays...though I'm fairly certain they must be all gone by now. Click Here


Peanut Butter S'mores Bars
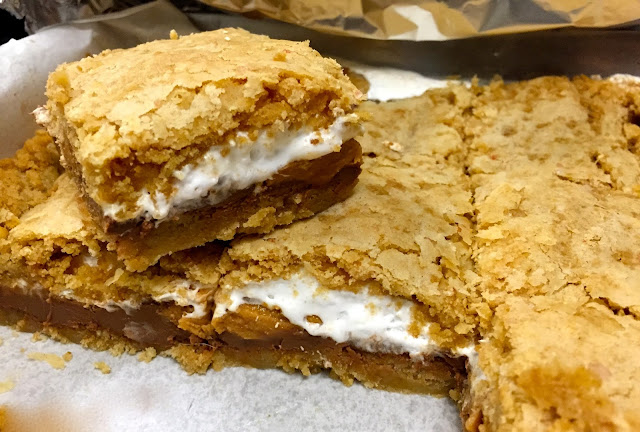
These are the effin bomb. The best chewy texture, wonderful nostalgic flavors amped up with peanut butter and just overall one of the most delicious dessert treats. Perfect to ease that holiday sweet tooth craving. Click Here


Scotcharoos
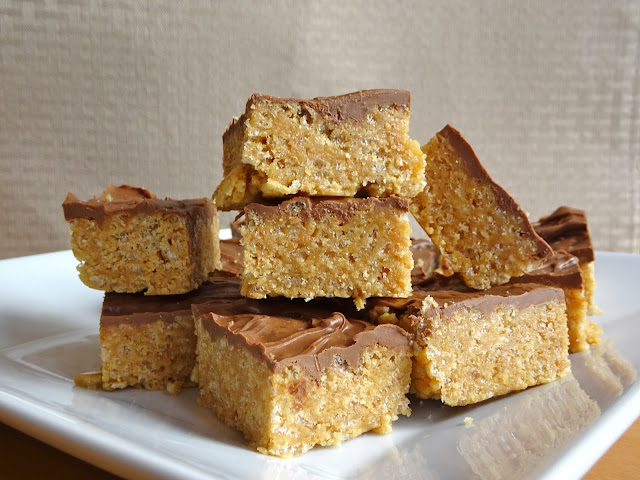
Flashback to the 1960s and we have the most delicious dessert that happens to be one of the easiest ever. It's great for parties as a hand held treat and everyone loves them. They're also super simple to make last minute. Click Here


Infused Vodkas
A great idea for a yankee swap gift or for fun festive cocktails at a party. I posted cucumber and hot pepper but I've also done other variations such as strawberry basil and blueberry. Insanely easy but thoughtful as you can base it on flavors you know your fam and friends love! Click Here


Homemade Bailey's Irish Cream Liqueur
Ahh what is more festive? Homemade Bailey's - something most people haven't had yet it is super simple and tastes amazing. Rich, creamy, boozy and heart warming. The best part if you are in control of the alcohol content so basically put as much Jameson as you deem fit - which for me that is a lot. Cheers! Click here


Happy Holidays to everyone at home! I wish I was there cooking for you all but know when I come home I will be guns blazing with Thai recipes and looking forward to sharing with everyone :)

PEACE AND LOVE!